Update ESP32 over the air
language: en
Developing Arduino boards is actually easier than one might think. You plug the development board onto your computer’s USB, fire up Arduino IDE, and with just a few key strokes and clicks you can upload a first sketch to your development board. But what do you do if you just finished a more complex project and your development board is hard to reach in a door bell, water tank or robot you built?
Arduino OTA
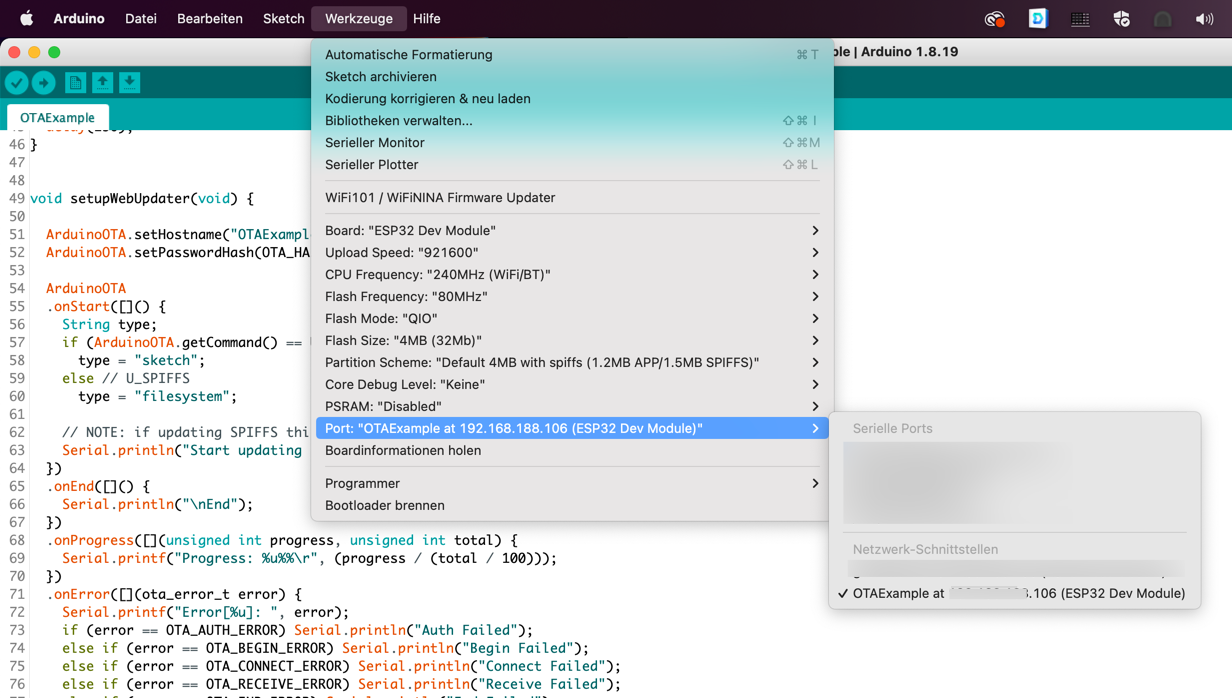
Arduino also supports so-called “over the air” (OTA) updates. These allow you to flash a new sketch to your development board via Wifi. For this you need the library ArduinoOTA and a Wifi-enabled development board. For the ESP32 board - which I am using - this dependency is already in the development libraries of that board.


The Sketch
In order to make basically every Arduino Sketch OTA compatible, you just need to implement the setupWebUpdater function shown below and call it from your setup function. Furthermore, your need to make sure to call ArduinoOTA.handle() in every execution of the loop function. As we don’t want everyone in our network to be able to easily flash new updates, we will define a password for the OTA updates: The password is provided as an MD5 hash (please remember: MD5 is not a good choice for hashing passwords). You can generate your hash easily by running e.g. echo -n "MySecretPassword"|md5 in your terminal.
#include <WiFi.h>
#include <ESPmDNS.h>
#include <WiFiUdp.h>
#include <ArduinoOTA.h>
#define WIFI_SSID "YOUR-WIFI-SSID"
#define WIFI_PASSWORD "YOUR-WIFI-PASSWORD"
#define OTA_HASH "7315a012ecad1059a3634f8be1347846" // echo -n "MySecretPassword"|md5
void setup()
{
Serial.begin(9600);
WiFi.setHostname("OTAExample");
WiFi.begin(WIFI_SSID, WIFI_PASSWORD);
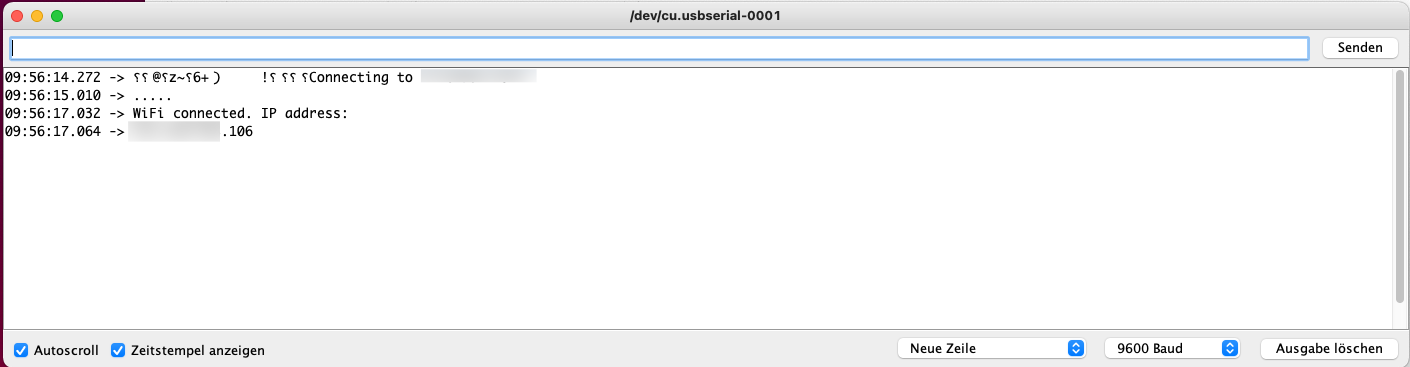
Serial.print("Connecting to "); Serial.println(WIFI_SSID);
while (WiFi.status() != WL_CONNECTED) {
delay(500);
Serial.print(".");
}
Serial.println("");
Serial.println("WiFi connected. IP address: ");
Serial.println(WiFi.localIP());
setupWebUpdater();
}
void loop()
{
// your logic
ArduinoOTA.handle();
delay(250);
}
void setupWebUpdater(void) {
ArduinoOTA.setHostname("OTAExample");
ArduinoOTA.setPasswordHash(OTA_HASH);
ArduinoOTA
.onStart([]() {
String type;
if (ArduinoOTA.getCommand() == U_FLASH)
type = "sketch";
else // U_SPIFFS
type = "filesystem";
// NOTE: if updating SPIFFS this would be the place to unmount SPIFFS using SPIFFS.end()
Serial.println("Start updating " + type);
})
.onEnd([]() {
Serial.println("\nEnd");
})
.onProgress([](unsigned int progress, unsigned int total) {
Serial.printf("Progress: %u%%\r", (progress / (total / 100)));
})
.onError([](ota_error_t error) {
Serial.printf("Error[%u]: ", error);
if (error == OTA_AUTH_ERROR) Serial.println("Auth Failed");
else if (error == OTA_BEGIN_ERROR) Serial.println("Begin Failed");
else if (error == OTA_CONNECT_ERROR) Serial.println("Connect Failed");
else if (error == OTA_RECEIVE_ERROR) Serial.println("Receive Failed");
else if (error == OTA_END_ERROR) Serial.println("End Failed");
});
ArduinoOTA.begin();
}
Summary
I like this approach quite a lot: It doesn’t add too much boilerplate to the sketch and therefore can become a default part of all your projects. There is even a “OTA Web Updater” example in the “ArduinoOTA” package - but that approach adds a lot of clutter and is less automated as it cannot be triggered directly from the ArduinoIDE.